
Today, I’m going to teach you how to build a simple To-Do app with local storage using Vanilla JavaScript. Don’t worry if you’re new to coding or don’t have much experience with JavaScript. I’ll explain everything in a simple way.
What is a To-Do App?
A to-do app is a simple application that allows you to create a list of tasks you need to accomplish. The application allows you to add, edit, and delete tasks from the list. Building a to-do app with Vanilla JavaScript is a great way to learn the basics of web development.
In this tutorial, we’ll create a basic To-Do app that lets you add, edit,and remove tasks from a list and we’re also storing the data in local storage as well so users can access their data anytime if they haven’t deleted it from their end(browser). We’ll be using Vanilla JavaScript, which is just a fancy way of saying that we won’t be using any external libraries or frameworks. Let’s get started!
Below are the steps we’re going to follow to build our todo app from scratch.
- Setting up the Project.
- Creating Todo app view.
- Adding some css to our app.
- Adding javascript functionalities
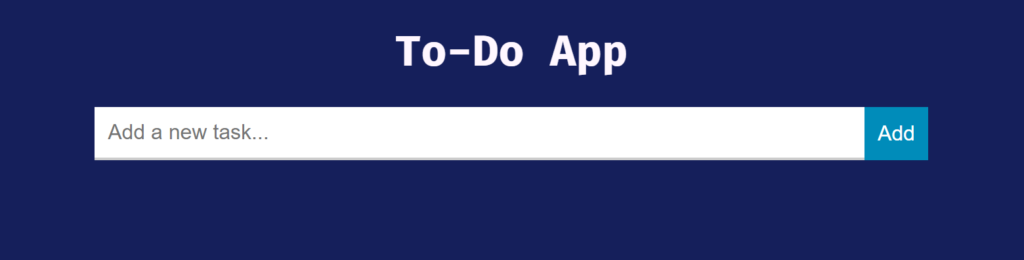
Before doing project setup let me show you what we are going to build, Below is the image of todo app we’re going to create in this article:

1. Setting up the Project
Before we start building our to-do app, we need to set up the project. First, create a new folder for the project and name it todo-app. Next, create three new files in the todo-app folder and name it index.html, style.css and app.js. Index.html file will be the main file of our to-do app.
2. Creating To-do app view
We’ve successfully done the setup of our project, Now, open the index.html file in your text editor and add the following code:
<!DOCTYPE html>
<html>
 <head>
   <title>To-Do App</title>
   <link rel="stylesheet" href="style.css">
 </head>
 <body>
 <h1>To-Do App</h1>
 <script src="app.js"></script>
 </body>
</html>
The following code is the basic structure of an HTML page. It includes a doctype declaration, an html element, a head element, a link element which connects our css file with an html file, a title element, and a body element. Inside our body elemented we’ve also added an app.js file using script tag. The head element contains the title of the page, and the body element contains the content of the page. Now, save the index.html file and open it in your web browser. You should see a blank page with the title To-Do App and a heading To-Do App.
Adding the Task Input Form
Now that we have set up the basic structure of our to-do app, let’s add the input form for adding tasks. Inside the body element of the index.html file, add the following code:
<form>
 <input type="text" name="task" id="task" placeholder="Add a new task...">
 <button type="submit">Add</button>
</form>
The following code creates a form element with an input element and a button element inside it. The input element is of type text and has a name of task and an id of task. It also has a placeholder attribute that displays the text Add a new task… when the input field is empty.
The button element has a type of submit and displays the text Add. Save the index.html file and refresh your web browser. You should see the input form for adding tasks, but you can’t add any element in todo list because we’ve not yet added that functionality yet in our code.
Adding the Task List
Now that we have the input form for adding tasks, let’s add the task list. Inside the body element of the index.html file, add the following code:
<ul>
</ul>
The following code creates an unordered list element. We will use this element to display the list of tasks. Now, we need to add some css to our application so it can look good.
3. Add styling to todo app
Now open the style.css file and, add the following code to the style.css file:
body {
    font-family: "Fira Code", "Arial Black";
    text-align: center;
    background: #151f5b;
    color: #fff7ff;
}

form {
    display: flex;
    margin-top: 20px;
    justify-content: center;
}

input[type="text"] {
    padding: 10px;
    border: none;
    border-bottom: 2px solid #ccc;
    font-size: 16px;
    outline: none;
    width: 60%;
}

button[type="submit"] {
    padding: 10px;
    border: none;
    background-color: #008CBA;
    color: #fff;
    font-size: 16px;
    cursor: pointer;
}

ul {
    list-style: none;
    margin: 0;
    padding: 0;
}

li {
    text-align: left;
    margin: auto;
    margin-top: 10px;
    display: flex;
    justify-content: space-between;
    align-items: center;
    padding: 8px;
    border-bottom: 1px solid #2cd1ff;
    width: 50%;
    border-radius: 5px;
}

li span {
    flex-grow: 1;
    font-size: 16px;
}

li button {
    margin-left: 20px;
    padding: 7px;
    width: 60px;
    border: none;
    background-color: #9f064a;
    color: #fff;
    font-size: 8px;
    cursor: pointer;
    border-radius: 5px;
}
This code adds styles to the different elements of the to-do app. The styles include setting the font family, margin, padding, and border of the body element, as well as the styles for the form, input, button, ul, li, and button elements. The styles use flexbox to align the elements and make the app responsive.
Now if you open the “index.html” file in browser you’ll see the changes like have in the picture below:
Now it’s time to make the to-do app actionable with the help of javascript.
4. Adding javascript functionalities
Now it’s time to add the add, edit, and delete functionality to our todo app. I’ve splitted it into small code blocks which will help you to understand it easily.
1. Querying the DOM for elements
Open the app.js file and paste the following code in it.
const form = document.querySelector('form');
const taskInput = document.querySelector('#task');
const taskList = document.querySelector('ul');
The code starts by querying the DOM (Document Object Model) for three elements using the querySelector() method:
- form: This refers to the HTML form element that contains the input field and submit button.
- taskInput: This refers to the input field in the form where users can type in their tasks.
- taskList: This refers to the unordered list (<ul>) element where the tasks will be displayed.
2. Initializing the tasks array
let tasks = [];
A new empty array called tasks is declared using the let keyword. This array will hold the list of tasks.
3. Defining functions for adding, deleting, and editing tasks
function addTask(text) {
    const task = {
        id: Date.now(),
        text: text
    };
    tasks.push(task);
    renderTasks();
    saveTasks();
}

function deleteTask(id) {
    tasks = tasks.filter(task => task.id !== id);
    renderTasks();
    saveTasks();
}

function editTask(id, newText) {
    const index = tasks.findIndex(task => task.id === id);
    if (index !== -1) {
        tasks[index].text = newText;
        renderTasks();
        saveTasks();
    }
}
The code defines three functions for adding, deleting, and editing tasks respectively:
- addTask(text): This function creates a new task object with a unique id (generated using Date.now()) and the text passed as an argument. The new task object is added to the tasks array using the push() method. The renderTasks() and saveTasks() functions are called to display the updated task list and save the changes to local storage.
- deleteTask(id): This function removes a task object from the tasks array by filtering out the object with the same id as the one passed as an argument. The renderTasks() and saveTasks() functions are called to display the updated task list and save the changes to local storage.
- editTask(id, newText): This function finds the task object with the same id as the one passed as an argument using the findIndex() method. If the task object is found, its text property is updated with the newText passed as an argument. The renderTasks() and saveTasks() functions are called to display the updated task list and save the changes to local storage.
4. Defining the renderTasks() function
function renderTasks() {
    taskList.innerHTML = '';
    tasks.forEach(task => {
        const li = document.createElement('li');
        const textSpan = document.createElement('span');
        textSpan.textContent = task.text;
        textSpan.contentEditable = true;
        textSpan.addEventListener('blur', () => {
            editTask(task.id, textSpan.textContent);
        });
        li.appendChild(textSpan);
        const deleteButton = document.createElement('button');
        deleteButton.textContent = 'Delete';
        deleteButton.addEventListener('click', () => {
            deleteTask(task.id);
        });
        li.appendChild(deleteButton);
        taskList.appendChild(li);
    });
}
The renderTasks() function is responsible for displaying the tasks on the web page. It first clears the content of the taskList element using the innerHTML property. Then it loops through each task object in the tasks array and creates a new li element with two child elements: a span element containing the task text and a button element for deleting the task. The span element is made editable using the contentEditable property, and an event listener is added to it to update the task text when it loses focus. Finally, the li element is appended to the taskList element.
5. Defining the saveTasks() function
function saveTasks() {
   localStorage.setItem('tasks', JSON.stringify(tasks));
}
The saveTasks function is responsible for storing the tasks array in local storage. It uses the setItem method of the localStorage object to set the value of the ‘tasks‘ key to the stringified tasks array.
6. Defining the loadTasks() function
   function loadTasks() {
    const storedTasks = localStorage.getItem('tasks');
    if (storedTasks) {
        tasks = JSON.parse(storedTasks);
        renderTasks();
    }
}
The loadTasks function is responsible for loading the tasks array from local storage and rendering the list of tasks on the web page. It uses the getItem method of the localStorage object to retrieve the stringified tasks array from local storage. If the tasks array is found, it is parsed back into an array using JSON.parse and assigned to the tasks variable. Finally, the renderTasks function is called to display the list of tasks on the web page.
7. Handling Form Event Listener
form.addEventListener('submit', event => {
    event.preventDefault();
    const text = taskInput.value.trim();
    if (text !== '') {
        addTask(text);
        taskInput.value = '';
        taskInput.focus();
    }
});
In this step we’re handling the submit event and adding a new task to the tasks array when the user submits the form. It listens for the submit event on the form element, prevents the default form submission behavior, trims the text from the taskInput element, and calls the addTask function with the trimmed text. It then clears the taskInput element and sets the focus back to it.
8. Invoke loadTasks function
Now call the loadTasks function which will load the local storage items in todo list, copy the following code and paste at the bottom of app.js file.
loadTasks();
9. Full Code
Below is the full code of the javascript:
const form = document.querySelector('form');
const taskInput = document.querySelector('#task');
const taskList = document.querySelector('ul');
let tasks = [];

function addTask(text) {
    const task = {
        id: Date.now(),
        text: text
    };
    tasks.push(task);
    renderTasks();
    saveTasks();
}

function deleteTask(id) {
    tasks = tasks.filter(task => task.id !== id);
    renderTasks();
    saveTasks();
}

function editTask(id, newText) {
    const index = tasks.findIndex(task => task.id === id);
    if (index !== -1) {
        tasks[index].text = newText;
        renderTasks();
        saveTasks();
    }
}

function renderTasks() {
    taskList.innerHTML = '';
    tasks.forEach(task => {
        const li = document.createElement('li');
        const textSpan = document.createElement('span');
        textSpan.textContent = task.text;
        textSpan.contentEditable = true;
        textSpan.addEventListener('blur', () => {
            editTask(task.id, textSpan.textContent);
        });
        li.appendChild(textSpan);
        const deleteButton = document.createElement('button');
        deleteButton.textContent = 'Delete';
        deleteButton.addEventListener('click', () => {
            deleteTask(task.id);
        });
        li.appendChild(deleteButton);
        taskList.appendChild(li);
    });
}

function saveTasks() {
    localStorage.setItem('tasks', JSON.stringify(tasks));
}

function loadTasks() {
    const storedTasks = localStorage.getItem('tasks');
    if (storedTasks) {
        tasks = JSON.parse(storedTasks);
        renderTasks();
    }
}

form.addEventListener('submit', event => {
    event.preventDefault();
    const text = taskInput.value.trim();
    if (text !== '') {
        addTask(text);
        taskInput.value = '';
        taskInput.focus();
    }
});

loadTasks();
5. Testing the To-Do App
Now that we have added the functionality and styles to the to-do app, let’s test it out. Open the index.html file in your web browser by double-clicking on it. You should see a form with an input field and a button to add tasks to the task list. When you add a task, it should appear in the task list. You can add as many tasks as you like. To delete a task, click on the Delete button next to the task. The task should be removed from the task list and for editing a task just click on text and it’ll be editable, just update it with other text.
Your app should look like this if you’ve followed the steps:
Congratulations! You have successfully built a to-do app with vanilla JavaScript. You can customize the app by adding more styles, changing the functionality, and adding more features. Experiment with different ideas and have fun!
Conclusion
In this article, we learned how to build a to-do app with vanilla JavaScript. We covered the basics of HTML, CSS, and JavaScript and explained how they work together to create a dynamic web application. We started by creating the HTML structure of the app and added some basic styles. Next, we added the JavaScript code to add and delete tasks from the task list. Finally, we added more styles to make the app look good and tested it out. By following this tutorial, you can build your own to-do app and learn more about web development.
your comments are appreciated and if you wants to see your articles on this platform then please shoot a mail at this address kusingh@programmingeeksclub.com
Thanks for reading 🙂